Author Topic: Ball Joint Repair  (Read 4363 times)

Offline Sjefke

  • Commodore
  • *
  • Posts: 915
  • Feedback: +0/-0
  • Gender: Male
  • The Yuzzum is in
Ball Joint Repair
« on: February 04, 2016, 07:57:01 PM »
I wanted to share this fix.  It's a little involved, but it worked.
Why all of a sudden a tutorial on Ball joint repair?   
Because I'm and idiot, that's why! :-X
I was working on upgrading the articulation on a figure, and the acrocyanate glue ran and froze the joint.  Not just any ball joint.  An Ultra-articulated Spider-Man wrist joint.  Correct me if I'm wrong, but I think that's the smallest ball joint ever made, and I needed that tiny ball joint for a specific project.  The hardest part of this project was trying to handle those tiny parts.

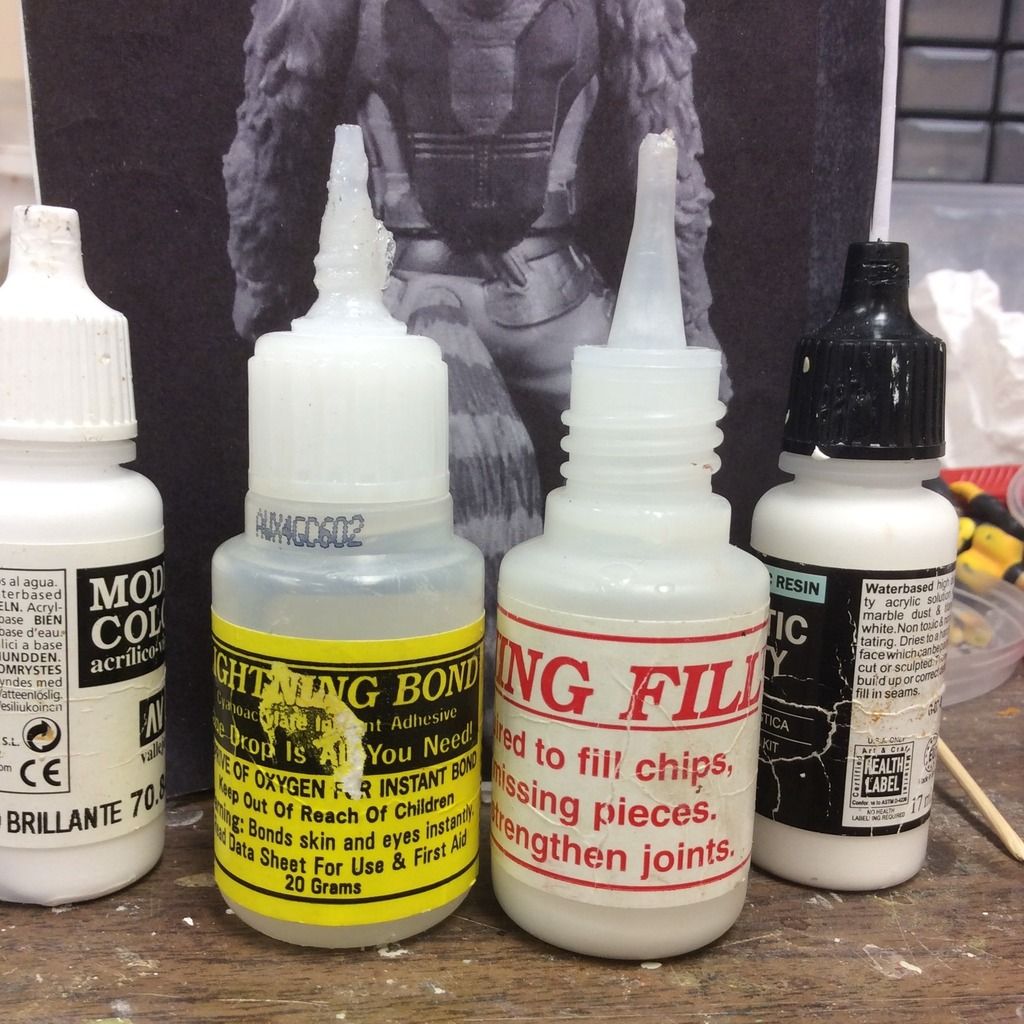
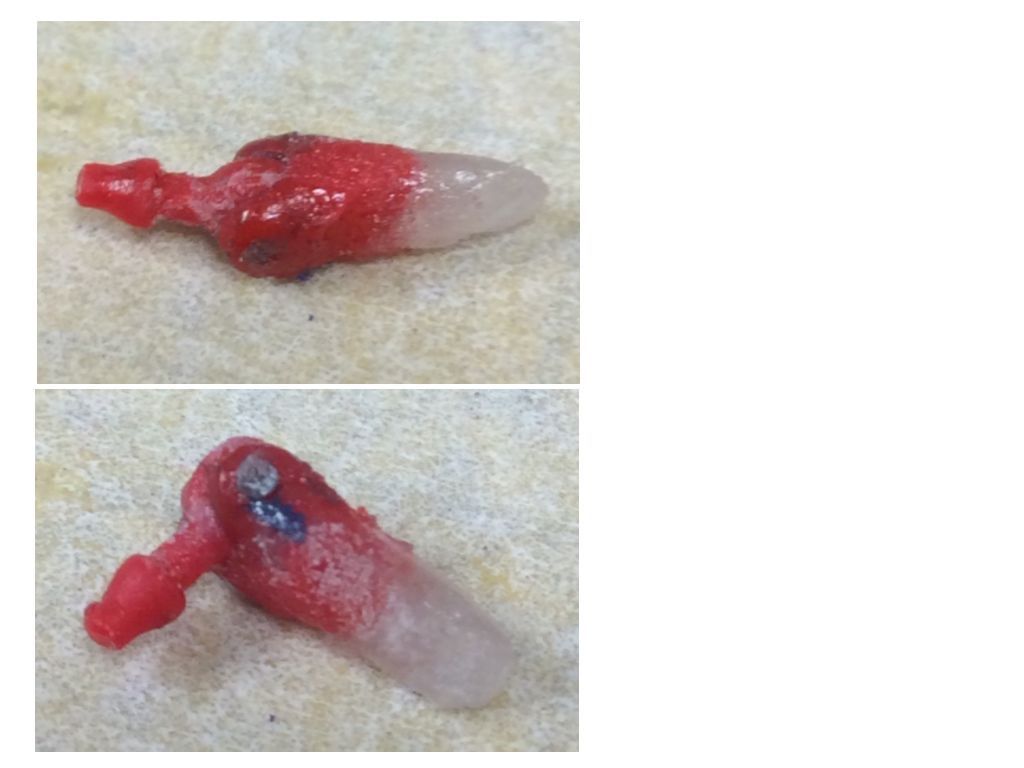
When I freed up the joint, the ring had snapped.  Since everything was pulled apart, I poured Lightening Fill in the break and over he rough spots and placed a drop of Lightening Bond on top.


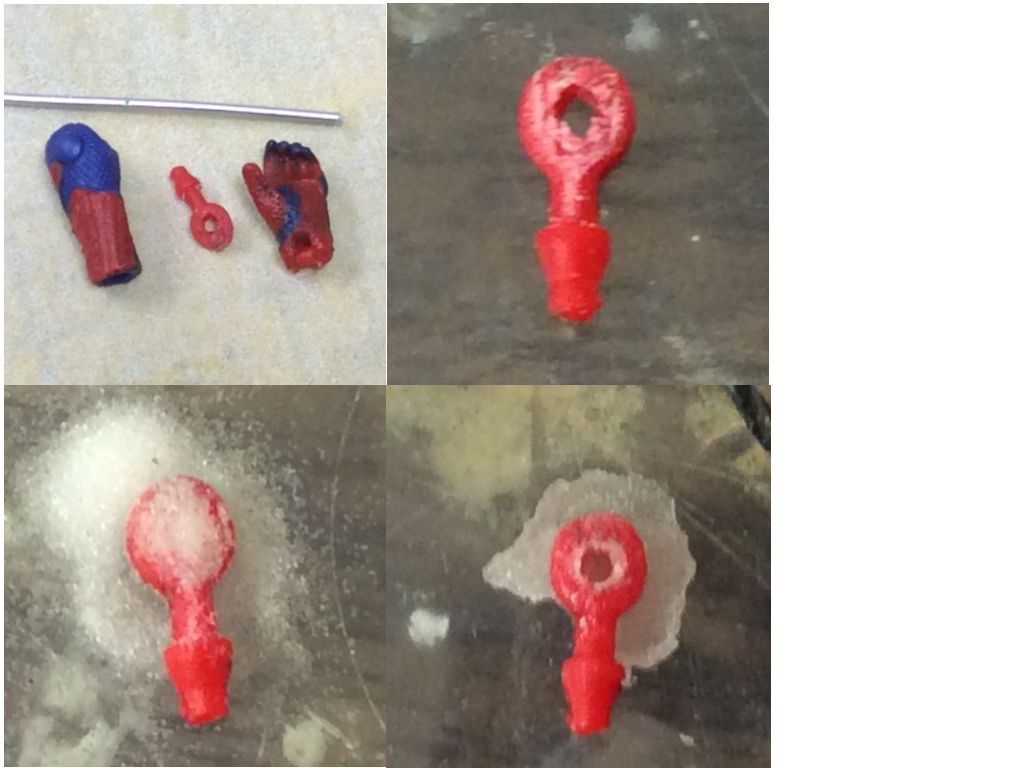
Scrape and sand the excess glue then drill out the hole.
I used the paper clip to rub it over the sand paper.


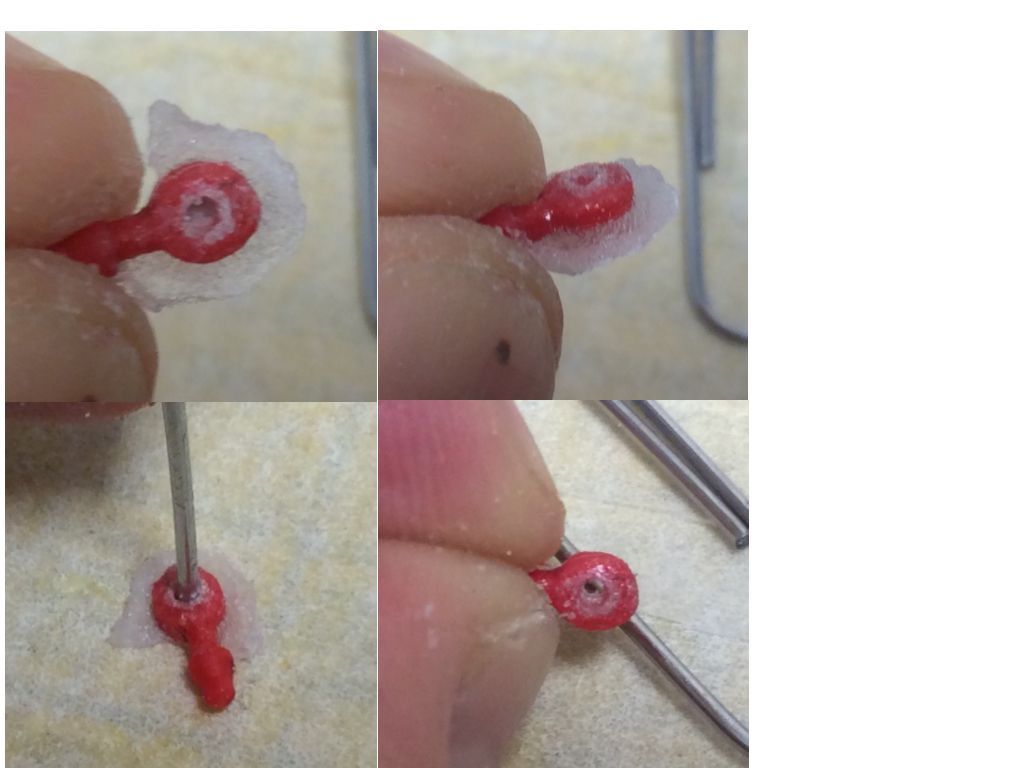
Cut the rod on the pivot.  Then drill out both sides.  Line everything up and insert a thick paper clip.


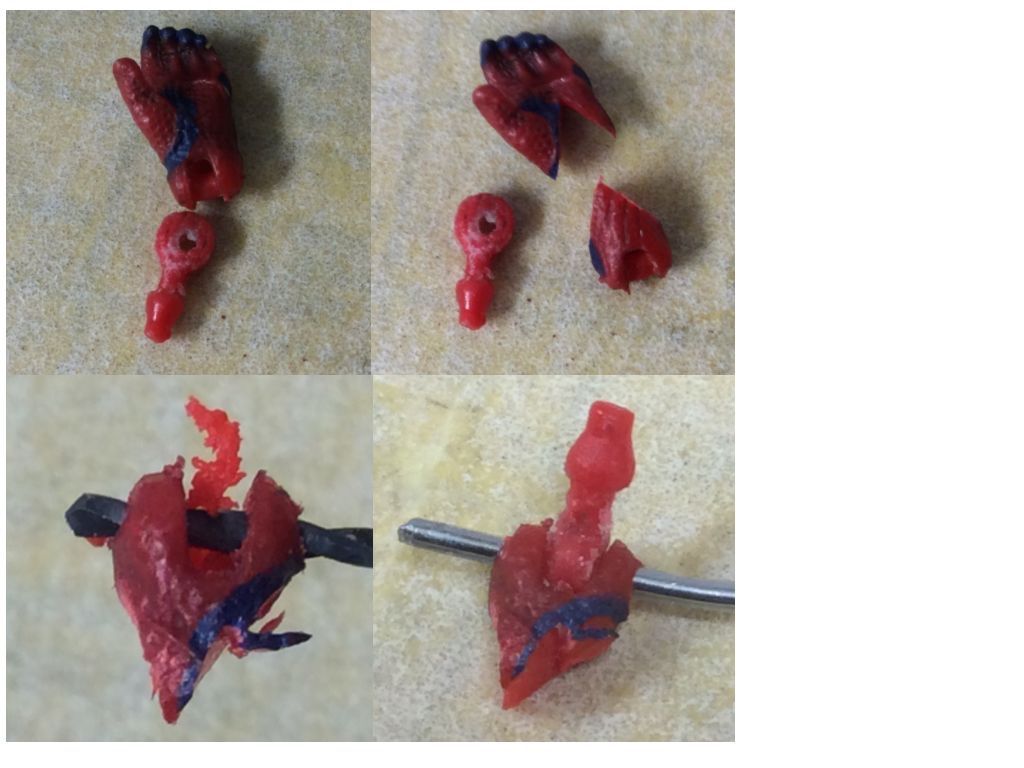
If it swings smoothly, trim the paperclip and secure them with a tiny bit of acrocyanate on both ends.  I use the end of a tooth pick as an applicator.


I hope this helps.
I'll post more fixes the next time I screw up.
« Last Edit: February 05, 2016, 08:35:11 AM by Sjefke »

Offline Tamer

  • Administrator
  • Grand Admiral
  • *
  • Posts: 37670
  • Feedback: +204/-0
  • Gender: Male
  • He who is one with the Walker
Re: Ball Joint Repair
« Reply #1 on: February 05, 2016, 03:22:29 AM »
My comments about this fix are on the front page. Thanks, as always Jeff.

Offline Sjefke

  • Commodore
  • *
  • Posts: 915
  • Feedback: +0/-0
  • Gender: Male
  • The Yuzzum is in
Re: Ball Joint Repair
« Reply #2 on: February 05, 2016, 07:45:45 AM »
My comments about this fix are on the front page. Thanks, as always Jeff.
No problem Tamer.  I'm glad I finally remembered to grab the camera. 
Figures are too expensive these days to throw out because something internal busted. 
I wish I'd taken pics of the time I broke TVC Ackbar's knee joint. 
I replaced the snapped peg on the ring with a tiny brad nail.

Ha!  Just found this one.
Here's one left over from my Pong Krell build.  This is a Thor movie Frost Giant hip, which is thankfully about ten times bigger than the Spidey wrist above.   I drilled out the broken peg and replaced it with a tiny screw.  The screw is obviously narrower than the plastic ring or else it would split the ring and hamper its rotation.  Take ensure it stayed in place, I applied a little acrocyanate at the base with a tooth pick.  Thankfully, it didn't run and freeze the joint that time.

« Last Edit: February 05, 2016, 08:36:16 AM by Sjefke »

Offline Starchaser

  • Moff
  • *
  • Posts: 4002
  • Feedback: +0/-0
  • Gender: Male
  • He who dares wins!
Re: Ball Joint Repair
« Reply #3 on: February 05, 2016, 01:21:17 PM »
Wow, thanks for the tutorials. These are really helpful (your not the only one who messes these things up!).

Offline Tamer

  • Administrator
  • Grand Admiral
  • *
  • Posts: 37670
  • Feedback: +204/-0
  • Gender: Male
  • He who is one with the Walker
Re: Ball Joint Repair
« Reply #4 on: February 06, 2016, 06:25:58 AM »
Another cool fix to share. Jeff loving this stuff. Thank you.

Offline Sjefke

  • Commodore
  • *
  • Posts: 915
  • Feedback: +0/-0
  • Gender: Male
  • The Yuzzum is in
Re: Ball Joint Repair
« Reply #5 on: February 06, 2016, 07:25:48 AM »
Thanks Tamer and Starchaser.

Offline Darth More

  • ...'cause we always want more...
  • Grand Moff
  • *
  • Posts: 4598
  • Feedback: +0/-0
  • Gender: Male
  • Darth More's Custom Workshop
Re: Ball Joint Repair
« Reply #6 on: July 14, 2019, 01:23:35 PM »
Thank you for sharing this tutorial here! You put quite some work into documenting each step with pictures. I think we all appreciate that! I will try your how-to on one of my fodder figures.

- Philipp