Author Topic: Rogue82's Custom Figures  (Read 7473 times)

Offline Rogue82

  • Ensign
  • *
  • Posts: 52
  • Feedback: +0/-0
  • Gender: Male
Rogue82's Custom Figures
« on: June 22, 2012, 02:32:22 PM »
Hi my name is Chris, long time lurker, 2nd time poster! Need to get my ass in gear and interact.

I've been a collector on and off since I was a kid and I've always been into making things for my toys. Decided to post some of my more recent work here and hopefully pick up some tips along the way.

So far I have:
  • Wedge Antilles Snowspeeder Pilot COMPLETE
  • Luke Skywalker Stormtrooper Disguise COMPLETE
  • Republic Commando Scorch WIP 1,2
  • Black Series Biker Scout COMPLETE

I've also stared customizing a couple of vehicles. The start of these can now be found in the vehicles section.
Outside of the toys I'm into the costuming side of Star Wars. I have full Stormtrooper armour and I'm (slowly) working on a Rebel Pilot's outfit. My WIP on this can be found here

Hope you enjoy.

Chris
« Last Edit: November 12, 2013, 06:57:22 AM by Rogue82 »

Offline Rogue82

  • Ensign
  • *
  • Posts: 52
  • Feedback: +0/-0
  • Gender: Male
Re: Rogue82's Custom Figures - Wedge Antilles Snowspeeder Pilot
« Reply #1 on: June 22, 2012, 02:41:19 PM »
First up is A simple head swap.

Wedge Antilles in Snowspeeder gear.


Head: Wedge Antilles - Rogue Squadron Comic Pack
Body: Kessin Omiss - Evolutions Pilot Set
Helmet: Wedge Antilles - Vintage Collection.

Like I say a simple head swap with the Kessin Omiss neck post sanded down to fit.

Offline JediMerc

  • Brigadier
  • *
  • Posts: 1244
  • Feedback: +0/-0
Re: Rogue82's Custom Figures
« Reply #2 on: June 22, 2012, 03:00:39 PM »
Welcome to the Yards, Chris! 

Nice first post: simple, but very effective parts swaps.  Wedge is one of the most underrated among background characters in the entire saga and it's a shame that, though Hasbro's given us multiple figs of Wedge to this point, none of them has really hit the mark.  This is a nice figure and one that Hasbro should've figured out how to produce and get out there by now.

Light side, dark side...meh.  Just give me a lightsaber and a blaster and I'll take care of it!

Offline Rogue82

  • Ensign
  • *
  • Posts: 52
  • Feedback: +0/-0
  • Gender: Male
Re: Rogue82's Custom Figures - Luke Skywalker in Stormtrooper disguise
« Reply #3 on: June 22, 2012, 03:31:01 PM »
Thanks for the nice words JediMerc. Of all the characters out there Wedge is a close second favorite to Luke for me. Survivor of two Death Stars and brought down an AT-AT (Tamer must hate him!) not to mention all the stuff in the EU. I love the way he's written in the X-Wing novels, a great leader. Figure wise, the VC one isn't a million miles off, in fact with the helmet on he looks quite good but unless he's in a cockpit he wouldn't have it on and Hasbro should have used a slightly taller pilots body than the 06 Luke one. Which leads nicely to my favorite character...

Luke Skywalker in Stormtrooper disguise.


Head: Luke Skywalker - Death Star Escape
Body: Stormtrooper - Legacy collection
Neck Post: Plo Koon - Revenge of the Sith Collection.

Like most people I wanted a shorter Luke Skywalker in the trooper outfit so I've made my own. I boiled and popped feet and hands and trimmed the gauntlets and shins a little at a time to reduce his height and his reach so that it didn't look like he had gorilla arms! This helped a bit but I still didn't feel it was enough. So I cut off his utility belt and cut the figure in half, removing a few millimeters with a dremmel and then gluing his hips back to his lower torso. This gave the figure the desired height. I dremmeled the wrist & ankle  holes back in and used the rounded drill piece to create a cavity for the peg to "pop" back into.

Initially I chose the Death star escape Luke head as I feel its the best likeness to Mark Hammil at that point in the film. This does cause problems though. The head is actually very long and still makes Luke seem taller. I may yet cut off the top of his head and sculpt new hair to make it smaller. The head choice meant a new neck post was needed so from the parts bin Plo Koon's was grabbed and attached. The final problem with this is that I had to carefully dremmel out the legacy Stormtrooper helmet as its meant to house a much smaller, balaclava'd clone head. This made the helmet very thin and it bulges a little around Lukes nose. Is there a Stormy helmet that fits better? Any thoughts would be great.


Offline wheeljack

  • Lieutenant
  • *
  • Posts: 213
  • Feedback: +0/-0
  • Gender: Male
Re: Rogue82's Custom Figures
« Reply #4 on: June 22, 2012, 04:03:27 PM »
That Luke head has some big hair, you can see that you chopped the Storm Tropper down quite a bit but Luke's big hair still makes him almost the same size. Good clean work can't wait to see more, welcome to the yard.

Offline Rogue82

  • Ensign
  • *
  • Posts: 52
  • Feedback: +0/-0
  • Gender: Male
Re: Rogue82's Custom Figures - Republic Commando Scorch
« Reply #5 on: June 22, 2012, 05:00:10 PM »
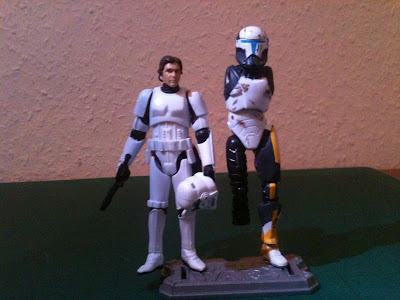
Thanks Wheeljack. I know what you mean. As kids we had pin head Han, this one seems to be Fat Head Skywalker! I'm reluctant to trim the head down yet as I dont yet have a spare DS escape Luke but as soon as I do he's getting his ears lowered.

Currently on my bench is Republic Commando Scorch. I wanted to see if I could combine a few figures to make a super articulated version. I saw Spudafett's biker scout tutorial on YouTube and thought WOW! I've got to try that.

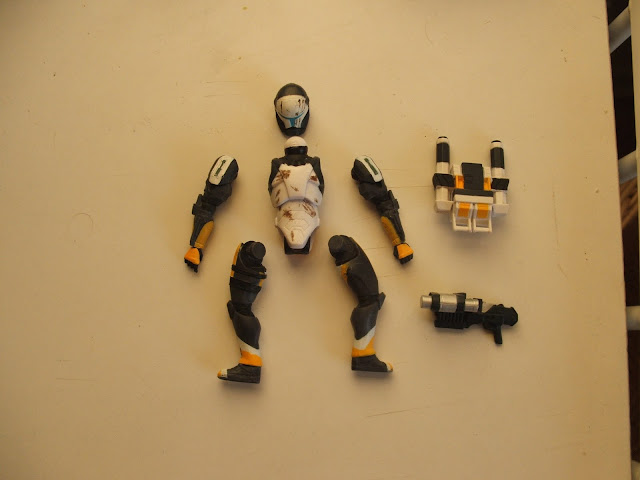
I started with a basic Saga Collection 2006 Scorch figure which had pretty good upper articulation for figures at the time. The majority of this figure will be used in some way. The Helmet and torso will be kept much the same (for now - may hollow out the helmet to make it removable). Arms from just below the shoulder down will be kept the same, legs will be hollowed out to fit over better articulated legs.
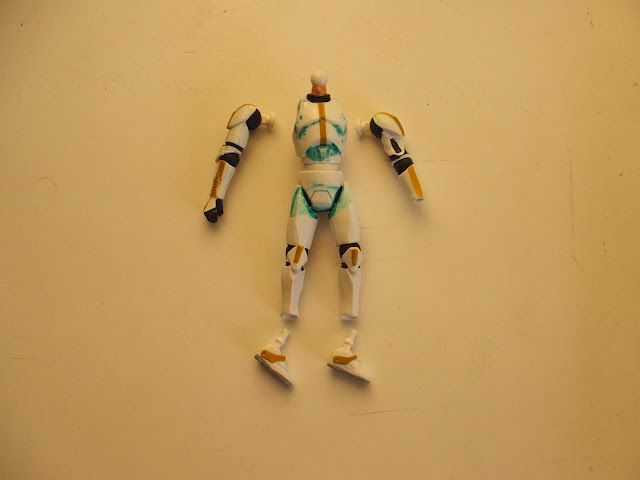
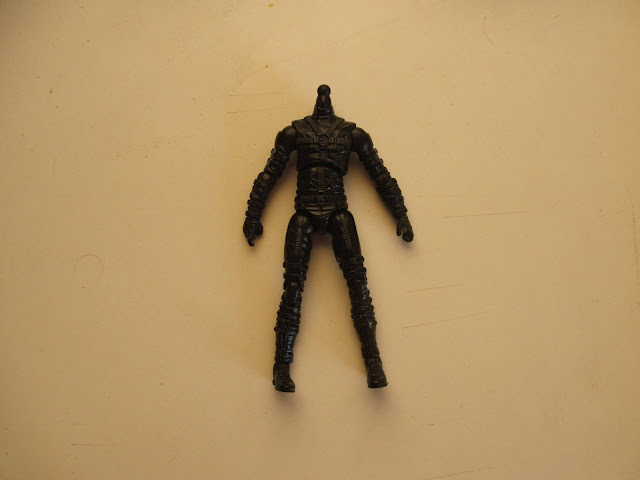
I also grabbed a Clone Wars Cody figure for the feet & shoulder joints, a Legacy Stormtrooper for the Head and Neck post (still not sure about this - It will be the last thing I do if it happens), and a Rex "the Doctor" Lewis GI Joe figure for the hips, thighs and knee articulation.

Scorch Figure Boiled and popped.


Scrap Clone Wars Cody Figure Boiled and popped.


Legacy Stormtrooper Head and neck post.


Rex “The Doctor” Lewis from GI Joe the rise of Cobra Movie


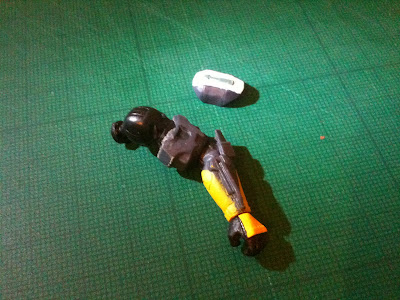
And here is the work so far. I had to cut the Rex Lewis figure in half to get at just the legs. Once that was done I shaved off as much plastic from around the crotch area as possible without making it to weak. I also drilled through the crotch of the scorch figure between where the legs had been (I know, every man on these boards is wincing at that image!). The Rex legs were then glued into the cavity allowing them the full range of movement granted by GI Joe figures.


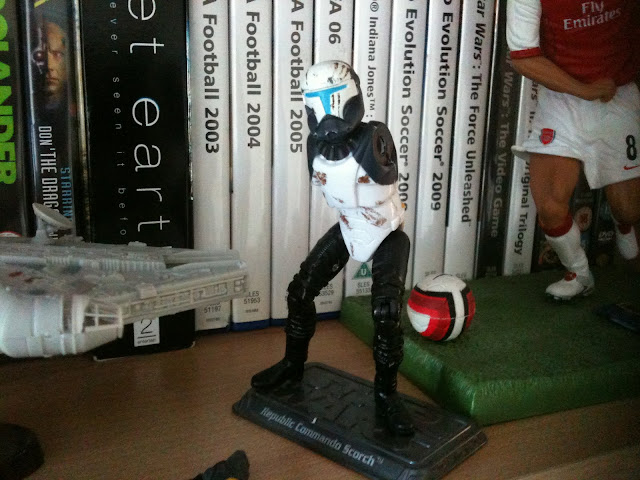
Next I cut the Scorch legs into four parts. The thighs, knee pads, calves and feet. I tossed the feet and hollowed out the thighs then shaved down all the details on the Rex legs to slip the scorch thighs over the top and then glue into place. The Rex calves were cut at the top of the boot and scorch's calves hollowed to the same point from the top so that they would fit inside each other. The knee pad was then glued in place on top of the Rex knee pad and finally the bottom of the calve was dremmeled to make an alcove for the Cody ankle joint. Here he is with one leg complete.


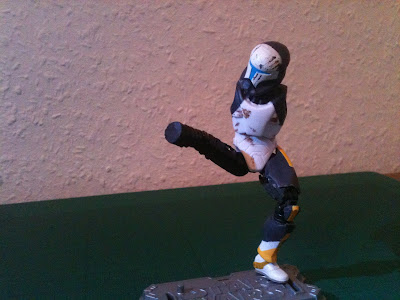
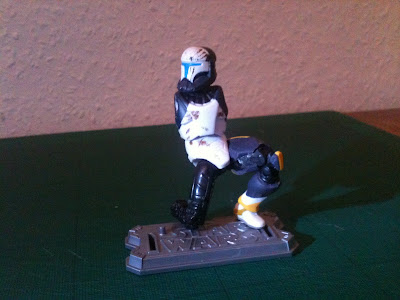
Height wise I may have a problem though. He's a little tall for a stormtrooper!
I think I'll have to take some more off the calves and push his ankles further in.


And finally for this post, the shoulder articulation. The elbow down was boiled and popped from both Rex and Scorch and then much like the legs, the shoulder and bicep from Rex Lewis have been shaved down and the Scorch bicep armour hollowed out and glued in place. Then the elbow down from Scorch was Boiled and popped into the Rex bicep.
Hope the Pic explains it more clearly, shown here with the shoulder pad.


Thoughts and critiques welcome

Offline Darth Optimus

  • Devourer of brownies
  • Brigadier
  • *
  • Posts: 1073
  • Feedback: +20/-0
  • Gender: Male
  • What I lack in skill, I make up for in creativity.
Re: Rogue82's Custom Figures
« Reply #6 on: June 22, 2012, 09:34:45 PM »
Looks great so far. Thanks for the tutorial.

Offline Tamer

  • Administrator
  • Grand Admiral
  • *
  • Posts: 37725
  • Feedback: +204/-0
  • Gender: Male
  • He who is one with the Walker
Re: Rogue82's Custom Figures
« Reply #7 on: June 23, 2012, 04:19:46 AM »
Wow, great first postings. That Scorch work is great. I look forward to seeing how that project finishes up. Time to go get this on the fp.

I spent a bit of time in your blog last night, very nice. Looking forward to seeing more work on that pilot suit. And I am in a permanent state of denial over any tow cables taking down a Walker. LOL. I do like Wedge though.

Offline Rogue82

  • Ensign
  • *
  • Posts: 52
  • Feedback: +0/-0
  • Gender: Male
Re: Rogue82's Custom Figures
« Reply #8 on: June 23, 2012, 02:06:41 PM »
Thank you very much for the front page Tamer. During my time lurking I've always had a look there to see the posts worth looking at so to have mine posted is awesome! Thank you.

I am a little further along with my scorch figure or more specifically the backpack. I wanted to light it up. One of the most prominent things on Republic commando costumes or even in the game is the glow from the helmet visors and weaponry and in Scorch's case, his Ordinance backpack. I've done some research on LED's and fibre optic cabling and realised I could house most of the electronics within the backpack and feed anything else I needed with fibre optics. Over at the Dented Helmet forums Boba_die_Wix has THIS costume and pictures showing all the various light up parts of a Republic Commando.
For Scorch this means:
  • Helmet Visor
  • Helmet Side Lamp
  • Ordnance Lights at the top of his backpack
  • Squad Number in the back of his backpack
  • His Gun
  • Apparently the pack strapped to his leg should glow aswell?

I'll cover the Helmet and gun later, I have Ideas for them but no work completed as yet. What i do have is some work on the backpack.
Materials used:

First I sliced off the black tip (placing it aside for later), then I cut off the white portion at the top of the ordinance lamp, meant to represent the lamp part, and discarded it. I then drilled a hole straight down but not all the way through the ordnance pole to the first part that connects to the backpack. I carefully sliced this away from the backpack and then dremmeled into it from the from that side and also drilled a small hole into the backpack (hiding both holes when it is glued back in place). I then fed the Fibre optic cable down from the top through into the backpack. I also sliced two small pieces of plastic sprue and threaded these on aswell. The end of the fibre optic cable is then sanded down to allow the light to spill out. This is repeated for the other lamp.


Next I dremmeled out the display on the back of the backpack and then used a scalpel to make the edges crisp this will be replated with a small transparent display, created in photoshop. To demonstrate how the backpack will work I've mocked this up using the Bike Light.

Light off                                                                                         Light on


Light off                                                                                         Light on


I will be using filters to dull down the amount of light released from the backpack to ensure there is no spill.

For working out the wiring I used a website pointed out by Spookymufu on the Rebelscum boards, below is the configuration I used, black tape used to hold it in place.


Fitting the batteries into the backpack.


The resistor sits outside the backpack as there is just no room inside and the electrical tape is in place to sit under the batteries and can be pulled to remove them when necessary.


You can see a small piece of plastic in the backpack offset to stop wires from touching and shorting the circuit.


Man that was a long post!! More info on how the helmet will work to follow but for now I just need to get soldering.
« Last Edit: June 29, 2012, 03:06:45 PM by Rogue82 »

Offline Mungo Baobab

  • Customs Merchant
  • Marshal
  • *
  • Posts: 1649
  • Feedback: +10/-0
  • Gender: Male
Re: Rogue82's Custom Figures
« Reply #9 on: June 23, 2012, 02:23:12 PM »
Can't wait to see the finished product.

Offline clone10

  • Brigadier
  • *
  • Posts: 1107
  • Feedback: +0/-0
  • Gender: Male
Re: Rogue82's Custom Figures
« Reply #10 on: June 23, 2012, 04:30:56 PM »
Awesome customs man

Offline Tamer

  • Administrator
  • Grand Admiral
  • *
  • Posts: 37725
  • Feedback: +204/-0
  • Gender: Male
  • He who is one with the Walker
Re: Rogue82's Custom Figures
« Reply #11 on: June 24, 2012, 05:08:11 AM »
Wow. What an awesome tutorial. This is gonna be a great reference thread in addition to a great custom figure. I appreciate you sharing all the pictures and step by step instructions. Spooky is well known here at the Yards, but if you could including that wiring guide link you pointed at I would sure appreciate that too. I am thinking folks will be in here all day trying to figure out their own led wiring.

We plan on having a roundtable about lighting sometime in the future. I could imagine what fun we could have getting you and Spooky together to talk lighting. On the front page again. I have no doubt it won't be the last time either.

Offline JediMerc

  • Brigadier
  • *
  • Posts: 1244
  • Feedback: +0/-0
Re: Rogue82's Custom Figures
« Reply #12 on: June 24, 2012, 05:49:32 AM »
The LED's in Scorch's backpack are going to look terrific...nice choice in adding a very realistic touch to him.  Really enjoying following your progress!

Light side, dark side...meh.  Just give me a lightsaber and a blaster and I'll take care of it!

Offline JLaban4

  • Commodore
  • *
  • Posts: 818
  • Feedback: +0/-0
  • Gender: Male
  • The only good lizard, is a dead lizard.
    • Follow this link to see my customs and other videos
Re: Rogue82's Custom Figures
« Reply #13 on: June 24, 2012, 10:43:13 AM »
Good stuff. Can't wait to see more!

Offline YakFace

  • Commander
  • *
  • Posts: 325
  • Feedback: +3/-0
  • Gender: Male
Re: Rogue82's Custom Figures
« Reply #14 on: June 24, 2012, 01:28:20 PM »
Awesome LED work! Lets get some more pics ASAP! ;D